December 28, 2010

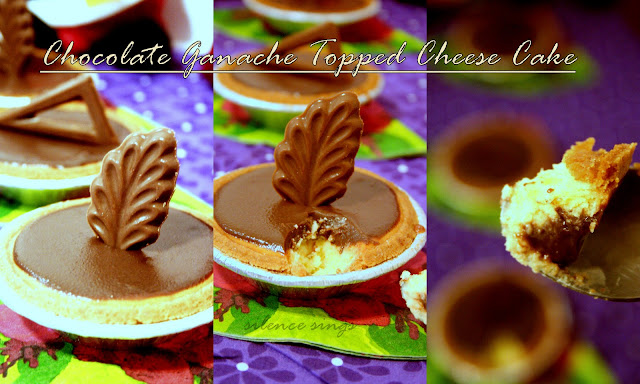
Chocolate Ganache Topped Cheese Cake

 Another hearty healthy feast has gone. But the festive spirit is not yet flamed off. Rather it is getting energized to welcome a brand new year. Christmas is the indication to wind up a year and to welcome another year. But wrapping and unwrapping gifts are all not done yet.  It's still to welcome a bunch of new gifts and grand party with your near dear one to toss the glasses in celebration of the new year .

 For us (my husband and me, daughter is too small to feel), the festive scenario is quite different. From past three years we end a year in packing and start a year in packing and moving to another land. We hardly feel the enjoyment of the new year. We hardly feel the spirit of shopping, buying gifts, et al. As for us, we keep on trashing things and weighing the suitcases to avoid the over weightage fine. Last two times we spent a huge bulk of money in giving fines as we are bound to make the suitcases over weight. This time we are determined not to spend any extra buck in fine. So we are just keeping on trashing all our favourite and unfavourite things with a  loaded heart every day. Our house is not getting decorated to welcome a new year. But We are taking off all the decorations to completely clean our house before we leave.  May be some of you will think that it’s a great fun to spend each year in a new land. But its not a boon to us at all. Mainly when you have a lil kid at home. We always keep crossed our fingers in the anxiety how our baby and her health will react after reaching to a new country. But this is what we call Life. A challenge that we have to accept every time.

 Any way, Now let me come to the recipe which today I would like to share. This is one of the most favourite desserts of my family which I am bound to make every week. Very easy to make and the taste is truly divine. I adapted the simple Cheese Cake recipe from Cooks.com and then added my twist with a layered Chocolate ganache on the top which gave the taste of the tangy cheese cake a sweeter version. Each bite melts down in your mouth and give an ultimate satifaction of a chocolaty creamy penchant.
Ingredients:-
For the Cheese Cake-

1.Cream Cheese- 8oz /1 packet (room temperature)
2. Eggs-2
3. Sugar-1/2 cup
4. Vanilla essence- 1/2 teaspoon
5. Ready made pie crust

For chocolate ganache-
1. Heavy cream- 1 cup
2. Milk chocolate- 1 &1/4 cup(grated or morsels)


Method:-
Cheese Cake:-

1. Pre heat the oven in 350 degree F.

2. Beat the cream cheese until soft. Add sugar and vanilla essence and mix all together nicely. Add egg one by one and beat till all the ingredients and nicely get mixed and turned in to a creamy texture.

3. Pour the mixture in the pie crust and bake for 40 mnts or till a tooth pick pricked in the cake comes out clean.

4. Take it out and leave it to cool down.

Chocolate ganache:-

1. Heat a pan and pour the cream. When the cream will become warm add the chocolate. Keep on stirring on a low heat until the chocolate melts and mixes in the cream nicely. Let the sauce make semi thick and then pour it on the cheese cake as a top layer.
2. Refrigerate the Cake over night to set. Decorate as you wish and serve.
Note:-

1.I got small bowls of ready made pie crust which are perfect for the party treats.

2. I am not sure whether cheese cake is available in India or not. But I was searching in the net and I came out with these tip. If we blend the cottage cheese, after straining of the water, till it turns in to a creamy texture, it can become a good substitute of cream cheese. I have not tried this tip yet. But will try it once I am back in India. One more thing to remember if your are using lemon to make cottage cheese then don't forget to rinse it thoroughly under cold water to get rid of the smell of the lemon.


December 25, 2010

Wish you Merry Christmas with Checkerboard Cookies

Wish you all a very Happy Christmas. Hope some of you are having and some of you already have a gala Christmas Feast along with all the mouth watering dishes and surprised gifts from Santa Claus with your family and friends. Though the Christmas bell has started to ring few weeks back of the respective day, when the house started to become fully aromatic with the small of baking cookies and cakes, buying gifts and packing them with colourful papers and shifting them in to decorated bags especially for this very day. The decoration every where is worth seeing. Even for my lil daughter's sake we also bought an artificial Christmas tree, decorated it to feel the spirit whole heartedly.
This time I tried this Checkerboard Cookies which came out real nice and tasty, though the visual satisfactory part of the checkers are not up to the mark. But still for a first time attempt it's not that bad too. I adapted the recipe from Here and this video also helped me a lot to make this cookie.

Note:
I am not writing the ingredients and the procedure again only to save my time as I followed the recipe more or less the same way it said. But would like to mention the variations I made. I made all the measurement of the ingredients half to make a small amount of cookies. I didn't use the lemon extract. I added an egg. As long as you will keep the dough in the refrigerator it will be easy to handle.

Once again wish you all Merry Christmas and a Happy new year in advance.
Updating the post : Sending it to the ongoing event by Kolkata Food Bloggers...


December 21, 2010

Pancake Roll

I prepared and took the snaps of the Pancake Roll, when Priya of Priya's Easy n Tasty Recipes, announced the Pancake event, a decade back. And then I totally forgot to post it and to send it for the event. I am like this. Due to my forgetfulness I rarely participate in the events. Today while spending few moments with the old memories I suddenly found the snaps which I treasured very nicely in my web album. Before I forget again I am posting it right now. Priya this is for you. This is a very common breakfast at our home. Both my daughter and hubby like it very much. Very easy to make and taste too good.I think it is also common in your kitchen too. Let me share how I make.

Ingredients:-
Pancake:
• Flour-1/2 cup(approx)
• Milk-1/2 cup
• 2 eggs
• Salt- As per taste
• Sugar- As per taste

Filling:
• Chopped Tomato, carrot and cucumber-2 cups
• Mayonnaise- 1 table spoon
• Italian seasoning- As per taste
• Black pepper-As per taste
• Grated cheese -1/2 cup (optional)
• Salt & Sugar-As per taste

Butter/oil to fry
Method:-
1. Mix all the ingredients written under pancake and make a nice and smooth batter. If you feel its too watery then add little bit of flour more. Or if you think its too thick then add little bit of milk.
2. In another bow mix all the ingredients written under Filling. And mix well together.
3. Heat oil/butter in a non stick pan. Pour the batter onto the pan, using approximately 1/4 cup for each pancake. Flip the other side when its done. Take a spoon full of filling and pour in a line on the pancake. Then fold the right side then the left side in roll shape.
4. Serve hot with sauce.

December 20, 2010

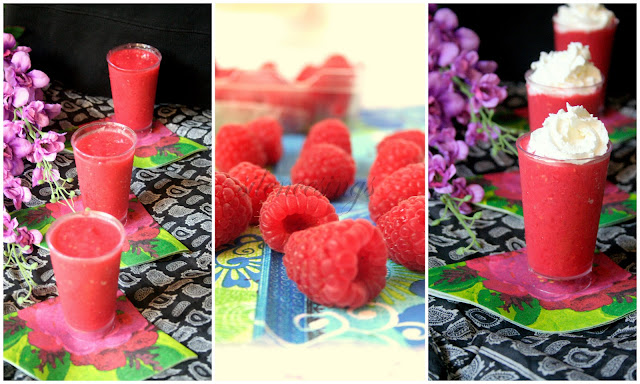
Raspberry Quell

Now before taking a big break from the blogging world I would like to share at least few of my favourite recipes which I enjoyed and loved to share with you all too. I don't have much time to spend a lot of time here. But I will try to post few of my favourite recipes and crafts which I enjoyed with my family. Today I am going to share this sweet after which is one of my daughter's favourites.

Ingredients:-
1. Raspberry- 2cups
2. Sugar- As needed
3. Yoghurt-1Table spoon
4. Whipped Cream for topping(optional)


Method:-
Mix all the ingredients except the cream and put in the mixer. Blend it until smooth. Put in the freezer for couple of hours. Then again put in the mixer to crush the ice. Serve it with whipped cream topping.

Note:
You can also serve it as a drink by adding little bit of cold water and a couple of spoons of yoghurt more.
Raspberry Icecream is also another very good option for a healthy dessert. Visit my Strawberry Icecream recipe. You can make it the same way as I made the Strawberry Icecream.


Sending this to Indrani of Recipe Junction 's Summer Fruit event:


December 17, 2010

Colour Pencil Holder


I announced for a break of week or so. But when I saw the date of my last post I was alarmed and ashamed. As almost two months were over. Time runs so fast every time. And our busy life travels in the time machine where in a wink distance we travel a long span. Last two months passed quiet in a busy schedule. Even now in future I am going to face much more busy days as now the time has come to pack our bag and baggage again and leave our this bohemian nest and to shift to another new country. The feeling is mixed- I am happy to see my mom, dad and sister after a long time, but I am sad too to leave this beautiful peaceful place forever. But the memories, for sure, will work as the nectar to sooth in my low days. Though I am back, can't promise to be regular. The load of packing is slowing making me crazy. And I am sorry that I am missing all of your wonderfull posts. Anyways, let me share something with you, with the hope you will like it.
Here is a small creation I made for my daughter few months back. The main intention of making this Colour Pencil Holder, is to make my daughter more colour conscious each time she is going to use her colour pencils. Every time she will use the pencils , will keep it in the proper place and come to know about the colour coordination and on the other hand it will slowly teach her matching the same things. Teaching colors to the kid is quite easy if you follow the simple prescript. Take one colour a day, talk about the colour and give the colour to your kid's hand and tell him/her to match the colour with the things around him/her. This way they learn very fast to identify the colours. Here is the small creation of mine which is  also one of the best examples of Best out of waste.

Things you need-
1. Coloured papers
2. A hard board for the base
3. Empty yoghurt cans
4. Glue/cello tape


How to make:-
1. Cover the yoghurt cans with different coloured papers.
2. Stick them on the Base.
3. And your Colour Pencil Holder is ready.

MyFreeCopyright.com Registered & Protected