Showing posts with label SIDE DISH/MAINCOURSE. Show all posts

April 13, 2016

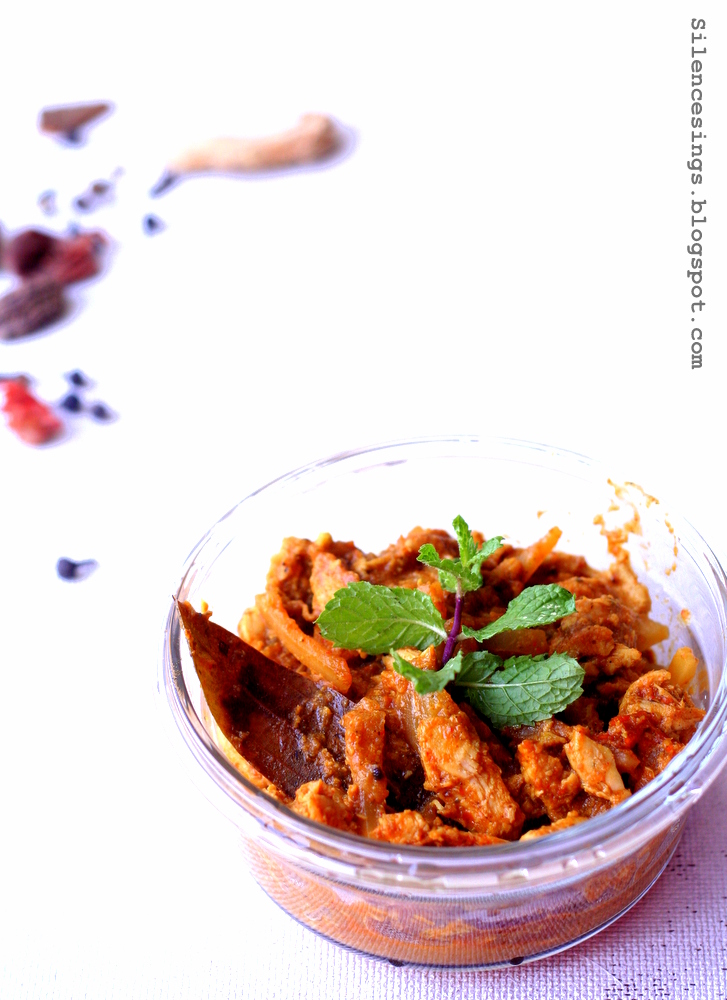
Shahi Garam Masala Chicken

Another new year stepped in. Wish you all good luck and happiness. All of you stay hearty and healthy. Eat well and a balanced diet. Drink gallons of water and juice to avoid dehydration from this scorching heat. This year summer is proving to be the hottest in regard to the past years. Any way, we never fail to celebrate any occassion that comes to our way whether it is too hot, or too cold. On this auspicious occasion of Bengali New year I wish you all Shubho Nababarsho. Hope this year will be a prosperous year for all of you. Enjoy the dish.
Ingredients:
Boneless Chicken - 200gm
Onion - 1 medium size
Ginger & Garlic paste - 1 tspn
Tomato - 1 small
Yogurt - 1 tspn
Turmeric Powder - 1/ tspn
Cumin Powder- 1/2 tspn
Coriander Powder - 1/2 tspn
Red chili powder - 1/4 tspn (More or less)
 Whole Shahi garam masala - (Cinnamon - 1 small stick, Black pepper - 1-2, All Spice 1-2, Mace, Green Cardamom 1, Black Cardamom seeds - 2-3, Clove - 1-2, Bay leaves - 1 )
Shahi Garam Masala Powder - 1/4 tspn
Ghee - 1 tspn
Oil - 1 tspn
Salt & Sugar as per taste.

Method:
1. Cut the boneless chicken into thin slices.Mix all the powdered spices and salt except the shahi garam masala with yogurt and make a smooth paste.  Marinate the chicken for a while.
2. Chop the onion and tomato separately.
3. Heat oil in a pan. Then add ghee. Add the whole garam masala. Once they splutter add the chopped onion. Saute till they turn semi brown.
4. Add the ginger garlic paste. Saute till turns brown. Add the Tomato. 
5. Once the tomato is cooked well and starts to loose oil add the chicken. Keep on cooking on medium flame till the chicken turns soft and tender.
6. Add the shahi garam masala and sugar (If needed). Blend nicely with the chicken. Once it is dry and well cooked, Take it off the stove and serve with rice or roti.
Note:
You can add potato if you want. 
For the veg version, the recipe works well with paneer and mixed vegetables.
**Shubho Nababarsho**

April 9, 2016

Celebrating Bengali New Year with Phulkopy Posto/ Cauliflower with Poppy Seeds

Bengali New year is heading and this time, I always feel nostalgic because I miss those wonderful days of my student life, my friends, and my teacher and above all my family. We cherish the different phases of our life. But I bet everyone will echo the same that the student life is the best time that everyone wants to get back it again and again. On this context, sharing few of my childhood memories which are engraved in my heart so deeply that every year on this very day I feel profoundly nostalgic and sad to get those days back.

I always felt exceedingly blessed when I thought that I had completed my education from Visva-Bharati, Santiniketan, a place founded by Rabindranath Tagore. The natural beauty of the place infuses its elegance through the mode of education. The freedom of creativity and ideas always evince through the various festivals celebrated on the auspicious occasions of special calendar events. During my school days, this Bengali New Year celebration used to start a week ahead. Those days are crystal clear to me. I can still visualise the little girl holding her mother’s or father’s hand heading towards the crafts shop to buy a bunch of white blank cards with full of excitement. The next few days passed within a fraction of moment with full concentration on filling the blank cards with all those imaginary creative mentation. In our school, the best part of Naba Barsho (New Year in Bengali) celebration is the exchange of these self-created cards. Each and every student used to create cards by his/her own hand and would gift it to his/her friends or would make friends by exchanging the cards. The new day becomes emblematic for inviting new friends, divulging one’s talent through the cards and a learning process of acculturation. Now coming at this age I realise the hidden truth of the festivity. But then that was only a satiated fun to amplify the friends’ group and also an exhibition of talents. Self-written short poems used to be scripted in the cards too.
Another fun of this day was to stand in a long queue in the scorching heat only to get a Kachori and two sweets. In our school premise, this snack used to be distributed to the students on this day. These most common bites used to become too tasty and sumptuous only on this very day. Now I am never going to get back those days, the tastes. Only what I have the fragrance of the sweet retention and an urge to make alive few of those memories through my daughter. My father has few of those New Year cards made by my sister and me in his collection. Sometimes I will surely share those with you all.


True Bong nature defines us as the epicureans who are head over heel in love with food. And when it comes to cleanliness Bengalis are very particular to keep their kitchen Clean to maintain the hygiene, not just looking clean and sparkling we make sure there is not a single cockroach in the kitchen. I grow up seeing my mother using Godrej LAL HIT. And I follow her steps too. It has become a ritual to use LAL HIT at least once a week to keep my Kitchen an anti-cockroach zone. Now LAL HIT even comes with deep reach nozzle, due to which I can easily spray it in places where cockroaches hide like a sink outlet, under the fridge, under the dustbin, under the cylinder etc. Say it Non Veg or Veg dishes, Bengalis will be always seen smacking there fingers and burping with utter satisfaction. I have shared most of the time Non- Veg delicacies. But this time I am going to share a Veg-Bengali Dish. Posto/ Poppyseed is one of the important ingredients and also very common in the daily meal mostly in the west Bengal cuisine. Last time I have shared Chhana Posto/Cottage Cheese with Poppy Seeds, where I got a raving feedback. Many tried it in the following days and my inbox got flooded with appreciations. I always feel like a blessed blogger when I get the feedback from my readers considering the true success of blogging. So now let us move to the recipe with out wasting much time:
Phulkopy Posto/ Cauliflower with Poppy Seeds
Ingredients:
Cauliflower: 1 medium size
Poppy Seed - 3 tbspn heaped
Mustard Seeds- 1/2 tspn
Ginger paste: 3/4 tspn
Tomato: 1 small (Optional- See Note)
Salt & Sugar : As per taste
Mustard Oil: 4 tbspn + 1 tbspn (If needed)
Raisins: Handful Soaked (Optional)
Ghee: Few drops.
Method:
1. Cut the cauliflower in to semi small florets. Clean nicely. 
2. Boil water desolving a tea spoon full salt. Pour the florets in to it and boil for 3-4mnts. Staring and reserve.
3. Soak the poppy seeds for 5-10mnts then make a smooth paste out of it.
4. Heat 4 tbspoon of  oil in a Kadai or a deep dense pan. Make sure that the oil is hot enough. Add the cauliflower in small batch and fry till they turn brown. Strain the excess oil and then reserve them on a kitchen towel/Tissue. Repeat the same with the remaining batches.
5. Check how much oil is remaining the pan/Kodai. If more oil needed then add. Temper the mustard seeds till those sputter then add the tomatoes (If adding) and the ginger paste. Saute nicely till oil starts to separate. Add the cauliflower florets and mix nicely. Add the poppy seed paste and 1/2 cup water. Cook till the Cauliflower is cooked and the the juice dried up. Add the raisins and few drops of ghee. Fold gently and then take it off the flame and serve with hot rice.
Note:
1. You can add potato along with the Cauliflower. If potato is added then fry how you have fried the Cauliflower.
2. Tomato I hardly use. So I felt it tasted better without the Tomatoes.

This recipe is off to the ongoing online event: Poila Baishakh with Veg-Bengali Dishes by Kolkata Food Bloggers:


(Disclaimer: This Post is in association with Godrej LAL HIT)


April 3, 2016

Mochar Ghonto (Dry Banana Blossom with coconut)

This year after almost 14 years I was in Santiniketan and became a part of Basantosav, one of the famous festivals of Santiniketan on Holi. To be honest, when my mother requested to visit Santiniketan, during this time, I was trying to avoid. I know it must sound very weird, but I never found Basantotosav interesting anymore. I never liked to accept the truth that I could not take part in the functions and I would be considered as a mere tourist. I never liked to enjoy Basantotosav without my friends. There was a time when I used to take part in each and every function of Basantotsav. Basantotsav was then an integral part of our life.  But this time, thanks to lil K who brought back the old memories and helped me to cherish them alive. When I reached Santiniketan the rehearsals were going on in full swinging. The Stage was getting constructed. All the more busy and festive scenario were seen all around.  I met the Lil K whom I wanted to see since she was born. After we stepped into Santiniketan, I hardly found her at home, rather she would be found engrossed watching the rehearsals of Chitrangada and other Basantotsav related functions. I used to get 3 hours break from my 10 months old's feeding hours. Within that break hours, I would rush to the rehearsals and invigorate those 3 hours to the fullest. Most of the time I felt an elated "I" inside me dancing with joy that rhythm often blurred my eyes in the form of tears. I started revisiting the memories that I locked inside me. The city life almost choked all the memories and I, too never wanted to dig them out. Again, thanks to Lil K whose spirited soul brought back my spirit again. Despite the huge crowd, despite all the restrictions that rudely forced me to accept, that I was not part of the Fest anymore, rather I was just a mere tourist who came to visit the Fest, I had fallen in love with Basantotsav again. And all the credit goes to lil K who infused the spirit of Santiniketan in her soul and enjoyed it from the core of her heart. The colour of Dol did emblazon my soul too.
Now let me come to the Mochar Ghonto recipe. Mochar Ghonto is a kind of dry dish made out of Banana Blossom. It is very common in a Bengali kitchen. I could still feel the taste the way my mamoni (My elder aunt) used to cook the dish. Till date that was the best ever Mocha Ghonto I have tasted so far. But I am pretty late to store the recipe from her. I had a distinct idea that she used to add a pinch of Hing/ Asafoetida in most of her dishes and Mochar Ghonto was no exception too. This recipe I have adapted from my mother. Ad I found my MIL also cooks in the same way. Enjoy the recipe here:
Mochar Ghonto
Ingredients:
Mocha (Banana Blossom) - 1 medium size
Potato - 1 medium size (optional)
Grated coconut - 3/4 cup
Whole Garam Masala - 2 each (Cardamon, Clove & Cinnamon)
Bay leave- 1-2
Oil - 2 tblspn
Ghee - 1/2 tspn
Turmaric Powder -  1/4 tspn
Salt and Sugar as taste
Method:
1. If you are using the whole mocha/banana blossom them you have to remove the blossoms after peeling away the outer leaves and clean. Then you have to take out a stem inside and chop finely. (See HERE how to peel a banana blossom)
2. Boil the chopped mocha for 15mnts adding little bit of salt and 1/4 tspn  turmeric powder.
3. Strain the excess water and reserve.
4. Cut the potato in cubes.
5. Take a Kadai and heat oil. Fry the cubed potatoes till they turn semi brown. Reserve them in bowl draining the excess oil. 
6. Now add the Whole Garam Masala and Bay leaves in the remaining oil. Once they start to splutter, add the boiled mocha. keep on frying for 5 minutes in a medium flame.
7. Add the coconut and the potatoes. Add salt and sugar as per taste. Then keep on sauteing till the texture become dry and you will get a nice flavour of cooked coconut. Add ghee and serve with rice.

Few more recipes with Banana Blossom:
Mocha Chingri (Non - Veg)

January 17, 2016

Baked Gondhoraj Chicken

Recently I am digging up all the recipes from my draft folder and blogging on them - the dishes which I have cooked almost 2 years back. Now a day the cooking part is though going on in full swing but clicking is like a nightmare for me. Preparing a whole set up for the photo shoot, then download them, if required going for editing- ah it’s better I should get some sleep saving that time. All new moms couldn't agree more that few extra hours sleep is like a cherry on the top of a cake. It's like cooking a dish is therapeutic, but wrapping up the meals, cleaning the kitchen and retiring to the bed as soon as possible to get some good hours long sleep is nothing but a boon. My elder one has become suddenly a grown up girl and quite matured who always stays with me like a shadow to help me out whenever I need. My little one is proving to be a good girl till date as she doesn't bug me much, loves to stay by her own. So I get a call only when she is hungry, sleepy or needs to change her diaper. Slowly I am stepping back in my old shoes, by starting up what I used to love most. I am cooking, baking and actively started to move around. But when it comes to clicking pictures I feel like I am having a split with my camera. There was a time I couldn't think my life without my camera and now I try to run away from it. May be everyone faces some phase like this when you need a break from which you covet most. The ardent photographer in me is still sleeping and I don't have the urge to wake her up too. So I am enjoying my camera less phase pretty well. But yes I miss that uplifting attitude of a photographer me and often feel that I am drowning away from the engrossing and enthralling food blogging world. I want to be active again but I am enjoying this phase too... So I guess I need to give myself more time to wait for the right time --Should I or not??..- I am confused...
Now coming to the dish I was pretty inspired by two recipe posts on Gondhoraaj chicken by my fellow Kolkata Food Bloggers Anwesha and Pritha{Click on their names to visit their recipes}. So I decided to try it out. Both the recipes ask for frying but I preferred to give it a baked version. So here is my version of Baked Gondhoraj Chicken. Try it out and I am sure it will be a winner.
Ingredients:
Chicken Thighs - 6 pcs
To Marinate:
 Onion - 1 medium
Garlic - 5-6 cloves 
Ginger - 1 inch long
Green Chili - 1 -2 (As per taste)
Juice of Gondhoraaj Lebu - 1 big (3/4 of the juice will be required for marination and 1/4 of the juice for basting)
Zest of Gondhoraj Lebu - 1/2 tspn
Black pepper powder - 1/4 tspn
Salt and Sugar as per taste

Ghee - 1 tbspn (optional, one can use olive oil or white oil)
Method:
1. Wash the chicken thighs and then pat it dry with a kitchen towel. With a sharp knife slit both sides of the flesh of the chicken thigh so that the marinades incorporate well.
2. Now prepare the marinade - Paste the onion, garlic and ginger together and strain out the juice as much as you can. Add the juice to the chicken and all the other ingredients that comes under the marinade section. Mix well and keep for and hour or two to rest.
3. Pre - heat the oven at 200c for 5 minutes. Take an oven proof tray and place the Chicken Thigh pieces on it. Bake it for 20 minutes.
4. In the meanwhile take the Ghee/ Oil and add the remaining 1/4 of the juice of Gondhoraaj Lebu.  
5. After 20 minutes turn the thigh pieces, brush the juice mixture on each and bake for another 20 minutes.  
6. Turn them over again apply the remaining juice mixture and bake for another 10 minutes. If you feel you need to bake more then turn over and bake for few minutes more.
7. Take them out from the oven and serve them hot with some boiled vegetables, bread and some dip. If someone needs more of the flavour of the Gondhoraj Lebu, then one can squeeze some juice on the top of the baked chicken thighs.

January 11, 2016

#BengaliRecipe - Cholar Dal


"It's Cholar Dal today."
"Are we having any party or some occasion to celebrate?"
Yes you got it right. There are some dishes that are meant for celebration. And if there is nothing, it will light up your mood only hearing that particular dish is on the menu. Cholar Dal is one such dish. We Bengalis love to devour cholar dal at any time of the four meals. Say it for breakfast or evening snacks with Luchi or Kachuris or in our lunch and dinner with rice or pulao. Among all the dals my favourite one is the Cholar dal. So to feed me Dal my mother used to the make the meals gleesome for me by making cholar dal often. She is a wonderful cook and has magic in her hands. But the way my Mamani (my elder Mashi/ Maternal aunty) used to cook, nobody can beat the taste. And the recipe has gone with her, along with many more old traditional recipes. Now I regret for not noting down them. I have seen her often using hing/Asafoetida in most of her dishes, eve in cholar dal too. That used to give an extra hint in the taste to ask for several servings. She died at 86 but till her death she tried to cook by herself and all with home-grinding masalas. She would religiously sit for hours every morning with Mortar and Pestle to grind her dry masalas. She was a cancer survivor, but she never let us know that she was once ill. We have seen her maintaining a strict healthy regime and diet and devoting much of her time in cooking delicious dishes. All her dishes were all most without any spices but that taste and aroma still I can feel on the tip of my tongue. She had a magic too in her hands. And we used to wait when she would be sending some dishes for us. I tried to replicate her recipe. It is almost near, but not like her.
Cholar Dal
Ingredients:
Cholar Dal or Chana Dal or Bengali Gram Dal - 1 cup
Hing/ Asafoetida - a pinch (Optional)
Tomato - 1 medium Chopped
Ginger Paste - 1 tspn
Turmeric Powder - 1/2 tsp
Coriander powder - 1/2 tsp
Cumin Powder - 1/2 tspn
Red Chili Powder - As per taste
Whole Dry Red Chili - 1 -2
Bay Leave- 1 -2
Whole Cumin Seeds - 1/2 tsp
Soaked Raisins - 1 tblspn (Optional)
Fresh Chopped Coconut - 1 tblspn
Grated Coconut - For Garnishing
Salt and Sugar as per taste
Ghee - 2-3 drops
White Oil - 2 tspn
Method:
1. Wash the Dal and soak for few hours. 
2. Boil it in a pressure cooker (4 to 5 whistles) with water, a pinch of turmeric powder and salt.
3. Take a Kadai. Heat the oil. Add hing/ Asafoetida. Soon after temper with whole dry red chili, cumin seeds and bay leaves.
4. Add tomato. Saute till it is soft and mashed. Add ginger paste and Saute till the paste starts to leave oil.
5. Add all the powdered Masalas and saute nicely. If it needs a bit water add the juice of the boiled dal. 
6. Add the chopped coconut pieces and stir saute for a minute. Now add the boiled dal. Add salt and sugar. Add the raisins.
7. Cook for a while (See Notes), add the ghee and then take it off the stove and garnish with grated coconut. Serve hot with rice, luchi/puri or roti.
Note:
i] The consistency of the dal should be not runny or too thick. 
ii] Taste wise it is slightly on the sweeter note. Therefore don't forget to add the exact amount of sugar that the taste asks for. 

January 3, 2016

#Easyrecipe - Baked Chicken Petit Cups

The holiday season was gone in a wink. Back to the routine life again. The season of the jingle bells, fancying around with the festive mood, the illuminated road sides all joined together to celebrate the end of a year and to welcome another new year. The last year went away to me in a fraction of moment. I have seen lots of ups and down this year and never wish to have this kind of year in my life again. But on the sweet note, last year blessed me my second princess who came to our life like a ray of hope. I must mention that I was able to overcome my pregnancy period fighting with all the odd situations because of the constant support and care of the elder princess and the man. I wish this year should bring us and everybody all the happiness and joy and prove a memorable one with all positive notes. 
                 As promised, I am here again with another #easyrecipe that can be done in all most no time. Very healthy and it is a kid's delight. Me and my daughter often enjoy it mostly when the man is on his office tours and we have to snuggle in a one pot meal.
Ingredients:
{Yields to 6 to 8 cups}
Minced Chicken 200grm
Grated carrot: 1 big
Blanched chopped Spinach - 1 cup (Water thoroughly squeezed)
Grated Cheese- 1 cup (more or less) {I used Amul}
Tomato - 1 small, sliced
Sweet Chili Sauce - 1 tspn
Italian seasoning - 1/2 tspn
Salt and pepper as per taste
Cornflour: 1 - 2 tspn (optional)
Method:
1. Take a muffin pan. Grease it oil.
2. Mix all the ingredients except the Cheese, Carrot and tomato.
3. If you feel the mixer is too soft then add cornflour (As per requirement).
4. Take a small portion of the mixture and put in the muffin cups. Press the mixture and give the impression of a cup.
5. Fill the other cavitities in the same way.
6. Now fille the cups with carrot and cheese and top it with a slice of tomato.
7. Bake at 200 degree C for 20 to 30 minutes.
8. Serve hot with some desired dip.
Note:
One can use other vegetables too for the mixture and for the filling.  


Wish you all a happy and Prosperous new year.


December 16, 2015

#EasyRecpe : Baked Chicken Caprese Salad

During the day time I am almost excluded from my kitchen by the cook. She loves to reign over the kitchen and gets disappointed even I peep in. She breezes around the kitechen with a constant jingle sound of her bangles and the utensils. I always try to avoid the musical concord and retreat to not interfere. The only interaction regarding food we have once in a day - my instruction what to cook and if something special then how to cook that. So I can own my kitchen only in the next half of the day when I prefer to cook the dinner. I always try to avoid an elaborate dinner. I prefer to keep it simple and healthy. Even the man after a tiring day loves to have something delicious, tasty but overall healthy and light. He wants to avoid rice so as my daughter. So most of the time it is something baked or grilled. /the other day I made Baked Chicken Caprese Salad and served with some boiled vegetables and baked cheese spinach.  It came out tasty, light and got cooked in few minutes. 
                                                               Once a visit to The Corner Courtyard during a review program Chef Chanchal offers a special dish Grilled Italian Chicken Patties with salad caprese and parsley garlic aioli to us. And I was so impressed and inspired by the dish that I decided to try it at home. Now Caprese Salad is one of the most simple salads in the Italian cuisine. It calls for sliced fresh mozzarella, tomatoes and basil, some seasoning with salt, and olive oil. During the time of the creation of this salad, it was kept in mind to made a resemblance to the colors of the Italian flag: red, white, and green. (Info from Wiki) Baked or Grilled chicken/ meat can be used to give it an extra volume to the taste.When I made the dish I baked the chicken. If you want you can grill it too. Just keep in mind while grilling, don't forget to braise it with some oil, preferably olive oil.
Ingredients:
(Yields 6 to 8 patties depending on the size)
Minced Chicken -200grm
Blanched chopped spinach - 2 tbspn (All the water must be completely squeezed out)
Chopped parsley: 1 tbspn
Chilli Flakes: 1 tspn (more or less)
Italian seasoning - 1/2 tspn
Lemon juice - 1 tbspn
Salt and Balck pepper as per taste


Mozzarella Cheese - Cut in thin slice in a shape of square (Depends on how many patties are there)
Tomato slices (Depends on how many patties are there)
Method:
1. Mix all the ingredients nicely.
2. Grease your hand with oil and take a small portion and give the portion a shape of a patty.
3. Take an ovenproof tray. Cover it with aluminum foil (See note #1) and grease the surface.
4. Place the patties on the tray and bake for 15 + 10 minutes turning each side at 200 degree Centigrade.
5. Take a serving plate. Place a slice of tomato, top it with mozzarella cheese and then on the top place the Chicken Patty. Relish it with boiled or stir fried vegetables and bread. I had with some baked spinach topped with cheese, boiled vegetables, salads and Bread. (See note how to eat it #3)

Note:
1. Whenever I bake some savoury dishes on a tray I always cover it with an aluminium foil. It helps to save a lot of time in behind of cleaning the burning stains.
2. If you want to avoid the cheese then simply have it with boiled vegetables and bread. 
3. To enjoy the taste, you must have a bite of  the Tomato, the cheese and the chicken patty altogether. That will give you the exact taste of the dish and to enjoy the every bit of it.

December 12, 2015

#EasyRecipe - Healthy Hassle- Free Chicken Curry

I get many requests from my readers to provide them some easy and healthy recipes which will be hassle free and don't require to spend hour after hour in the kitchen. Even my sister always asks for easy and tasty recipes who resides in abroad and can't get much time to spend in the kitchen as her overactive son keeps her dancing around him all the time. So I decided to start a series of  #EasyRecipes that will be healthy, tasty and will be hassle-free. Now this chicken curry is my all-time favourite. It goes perfectly as an accompaniment of a light meal or as a party dish. Only it depends on the cooking timing and a bit changes in the Ingredients. Like if you are making it for a party the recipe will ask for some extra oil to make it a bit rich. The portion of the powdered Masalas can be increased too. The cooking time will be a bit longer until the juice gets reduced and turns the dish to a thick gravy when the chicken gets completely cooked. The preparation time is very less. I cooked mutton in the same manner. Will post the recipe soon. So let us move to the recipe and enjoy it:
#EasyRecipe - Healthy Hassle- Free Chicken Curry
Ingredients:
Chicken cut into pieces -  700 - 800grm
Potato - (Optional - as much you want)
Chopped Onion - 2 big
Whole Garlic  cloves - 4 -5 + handful
Ginger paste: 1 & 1/2 tspn
Tomato - 1 small
Yogurt - 2 tbspn
Turmeric Powder - 1 tspn
Cumin Powder - 1 tspn
Coriander Powder - 1spn
Red chili Powder - 1 tsn (more or less as per your taste)
Whole Garam Masala - 2 each
Oil - 1 tspn (See note #1)
Ghee - 1/2 tspn (optional)
Salt as per taste
Method:
1. Wash the chicken thoroughly. Drain out all the excess water and keep aside.
2. In a grinder paste all the ingredients except the handful of garlic cloves, whole garam masala, and oil.
3. Marinade the chicken with the mixture for half an hour or so.
4. Heat oil and ghee in a deep dense pan or a Kodai. Add the whole Garam Masala and a handful of whole garlic gloves. Stir it till the garlic cloves are semi brown.
5.  Add the chicken and Saute on high flame for 5 mnts.
6. Then Cover a lid and let it be cooked in a low flame unless it is done. If you want to add potato (See note #2) then add it. Don't forget to give a stir in between. 
7. It will take approximately 30 to 40 minutes (more or less) to cook depending on which type of chicken (Boiler or frozen ) 
8. You can have it as a light chicken curry that goes perfectly with rice or with a thick gravy that perfectly accompanies with roti. Whatever consistency you like to have, cook the chicken in that way.  For thick gravy when the chicken is almost done please cook on high flame until the juice evaporates. 
9. There is no need to add water. The enough juice gets released from the chicken that helps to cook the chicken completely. But if you feel water is needed then please add warm water not cold water directly.
Note:
1. Any oil (Mustard, Sunflower or Olive oil) can be used. Now if you want to make this dish for a party then I would suggest you, to add a little oil extra (1 or 2 tbspn). You can increase the portions of the Powdered masalas too..
2. If you are adding potato then please keep on an eye that the potato should not be over cooked. If the potatoes are done but the chicken needs to cook for few more minutes then please take out the potatoes and add it again when the chicken is completely done.


December 7, 2015

Macher Dimer Bora or Fish Roe Fritter

I have never thought that I will document the pure Bengali dishes in my blog. Yes, it must sound weird, as being a Bengali how come one can utter those words so easily! But to be honest, I was never a Bengali food lover. Mainly fish was not in my favourite list except Hilsa and Prawns. My taste bud always forced me to love the continental style of cooking. But once you become a mother you become aware of all the tiny little things. I became more aware to teach my daughters the root of our culture and found food is one of the most interesting contributions of it. I wanted my children to know their culture well and loved the way our each Bengali dish interweaves the memories and the stories trailing to us from our great great grandmothers. I love the way the authentic traditional recipes float to us without any change and give us the identity of who we are by birth, by food, and by culture. What was my outlook or my food habit that got lessened because maturity makes us to understand, that unless you know your root well you will be standing in a no man's land. I understood why my Father relocated back in India with us, leaving behind a promising job and a comfortable life. My father is a strong puritan when it comes to his culture and motherland. He wanted his daughters to grow as an educated lady bearing their Bengali culture as their ornaments. I am not sure how much I was able to bear it through to fulfil his dreams, but now the same dream I have woven for my daughters too. I keep on documenting the traditional household Bengali recipes for my daughters, so that when they will grow up they will not miss them out. I also realised that there are so many traditional recipes got lost with the people whom I missed so much to stay in this world alive and help me out in documenting those with the stories related to it. I miss the memories of my grandmother how she used to make each dishes so skillfully, tasty that was also using the less ingredients that a recipe calls for. I missed my Elder Mashi (Maternal Aunty, whom I used call Mamoni). She was a brilliant cook and till her death I saw her using homemade masalas made by her own. I never thought of documenting those when she was alive. But now I realised what treasure she has taken with her and what I missed.
Macher Dimer Bora or Fish roe fritter is something that is one of the most common dishes of any Bengali household cooking. My MIL makes a sumptuous curry out of it. Please check the note for the recipe. I thought of documenting this recipe for the fiture reference for my kids.
Ingredients:
Machher Dim or Fish roe: 100gm (Rohu /Katla)
Onion finely chopped - 1 small
Ginger finely chopped / paste - 1/2 tspn
Coriander Leaves finely chopped - 2 tspn
Turmeric powder- a pinch
Flour - 1 - 2 tbspn (More or less - As per requirement)
Green Chili finely chopped - 1 (More or less - as per your taste)
Salt and pepper as per taste.
Mustard Oil - As much needed for deep frying
Method:
1. In a bowl mix all the ingredients except the flour and mix nicely. 
2. Heat enough oil for deep frying in a Kodai. Make sure the oil should be piping hot.
3. Slowly mix the flour in small amount unless it is ready to hold for frying. To test it, take a tiny portion from it and put it in the hot oil. If it is floating then it is ready.
4. Now take small portions from the dough giving a roll in shapes of a ball by your one hand only and then put it in the piping hot oil. In the medium flame keep on frying unless the fritters turn brown. Serve hot with Rice and Dal.
Note:
1. You can add chopped spring onion, a pinch of cumin and coriander powder to make it more tasty.
2. My MIL often makes a curry out of it. Just adding ginger paste and chopped tomato in little oil. When the tomato is well blended she adds a paste of cumin, turmeric, coriander and red chili powder. If one wants potato cane be added too. Then she adds water and it comes to boil the fritters are added. She adds salt to taste and a some whole chilies. That's all.
MyFreeCopyright.com Registered & Protected